Friday 26 May 2017

Something Old. Something New.


This is a story of a very, very special recent custom order.

If you're familiar with my jewellery you'll know that what makes me tick, creatively, is giving antiques and vintage materials a new life.  Mostly I work with found materials; various bits and pieces I find on my travels.  Occasionally I have the privilege of being able to work with other people's precious heirlooms.  That's when things get really interesting.

C is a good friend of mine.  We've known each other since our babies were tiny and we've leaned on each other for support many times over the years.  I was delighted, and slightly daunted, when she asked me to make her wedding jewellery.  Particularly as she was entrusting me to work with some treasured family jewellery.

She had inherited from her paternal Grandmother a lovely string of pearls, and a stunning necklace of Aurora Borealis crystals.  Both necklaces were utterly beautiful, but broken and unwearable.  My mission was to turn them into a necklace, and earrings, for her big day.  It would be both her 'something old' and her 'something new'.  The pressure was on!

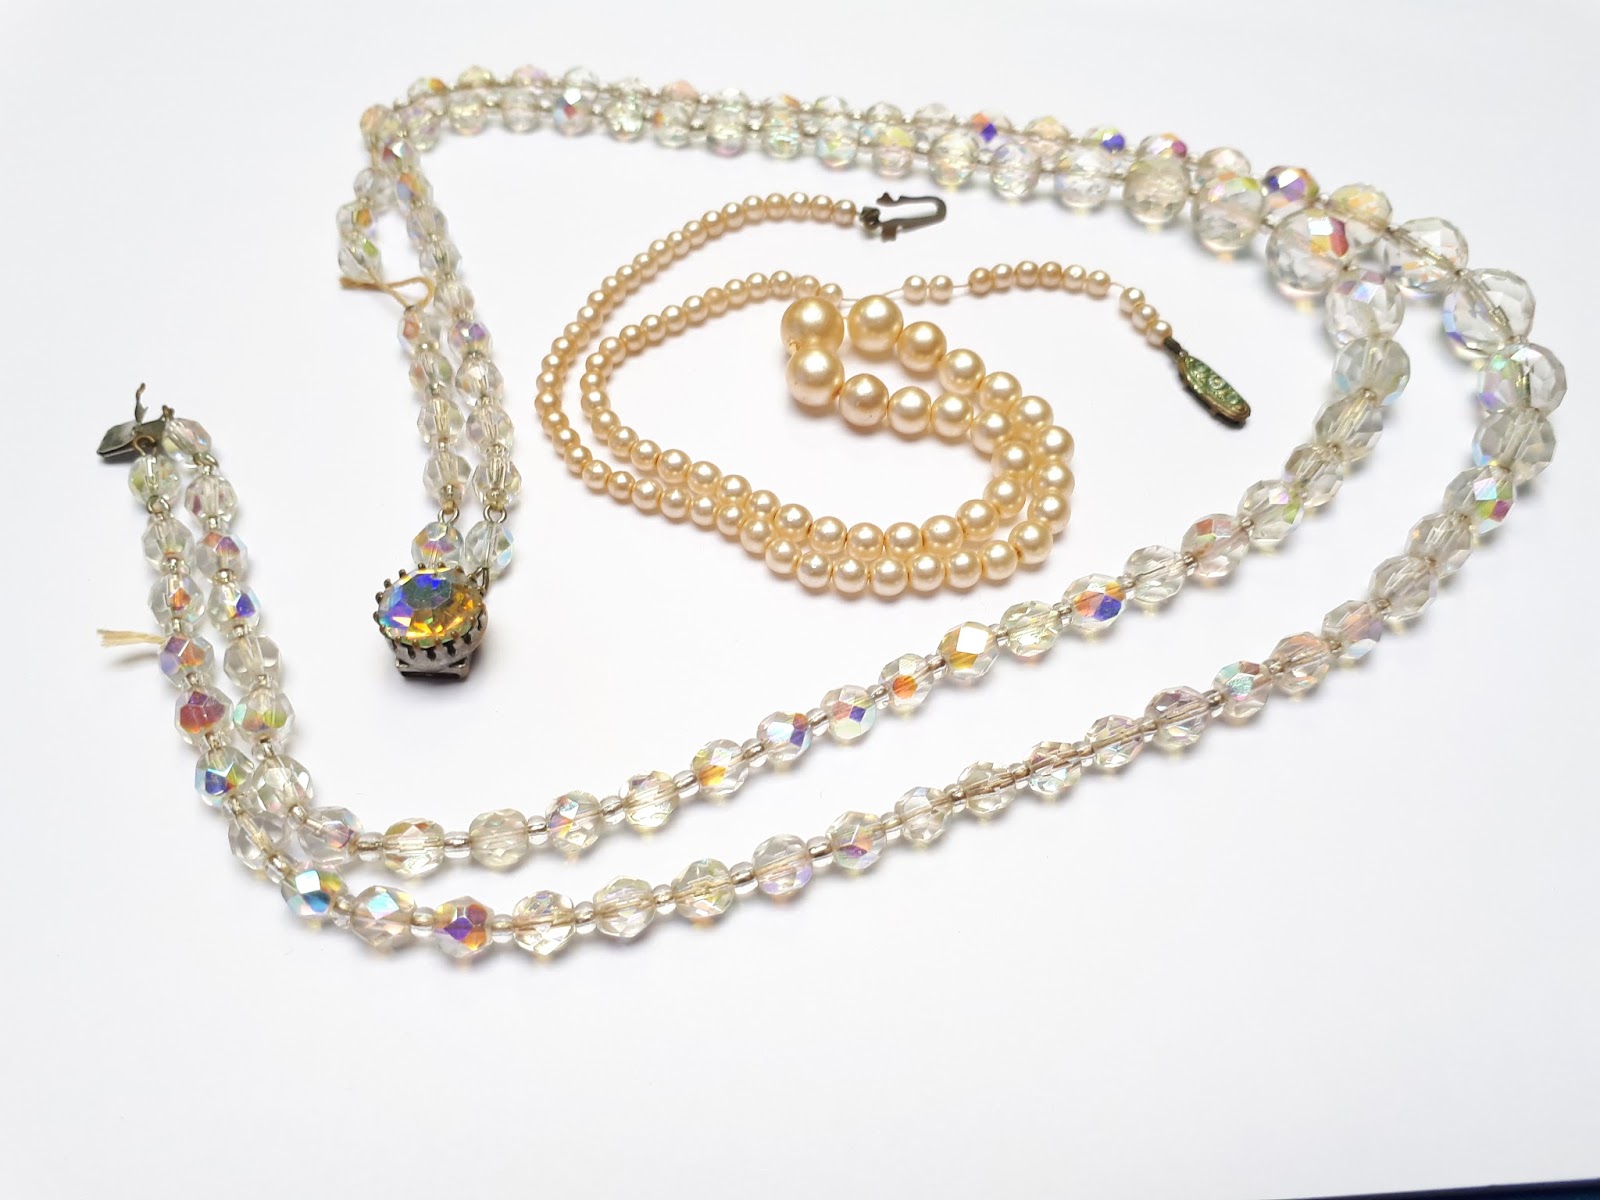
Vintage pearls and a crystal necklace.

We started back in February by sitting down in my kitchen with some tea and biscuits, to talk through some ideas.  C showed me a photo of her wedding dress, so I got sketching and took lots of measurements as she described her tiara and veil.  The dress incorporated Swarowski crystals, so something sparkly was a must.  It also had a strapless bodice and full skirt with train, so the necklace had to balance the dress by being suitably substantial.  I suggested incorporating some of my antique chandelier crystals to bring her own pieces together, and create a focal point for the finished necklace.  

Notes and initial necklace designs from my sketchbook

Next I had to take the plunge and take apart the old necklaces.  This is always the unnerving part when working with family heirlooms.  What if I loose vital beads?  What if they break?  I began by carefully cutting each individually knotted pearl from their strings.  Once bagged up, I set to work on the crystals.  These were cleaned, sorted into size order and bagged up.  The tiny glass spacer beads had a bag to themselves.  What stunning beads and what beautiful clasps!  This is why I love vintage materials so much... the quality is so high.  

The treasures are dismantled. No turning back now!  

With the beads carefully graded I could start setting out the necklace on my beading board.  I don't usually work with so many beads, and I don't usually work with beading string.  I'm more of a pliers, glue, and screwdriver kind of jewellery-maker!  I chose a high-quality silk chord, in two thicknesses, which would be strong but fine enough to pass through the tiniest pearls.  The next challenge was sourcing the right sized pendant bail, to fit the big chandelier crystal centrepiece.

Setting out the design on my untidy bead board.  

The three strands of beads were gathered together at the middle of the necklace, passing through the large crystal drop, to create a loose swagged effect.  The strands then wound round each other, coming together and connecting up to a smaller chandelier crystal at each end.  The remaining length was made up of the smallest pearls.   
 
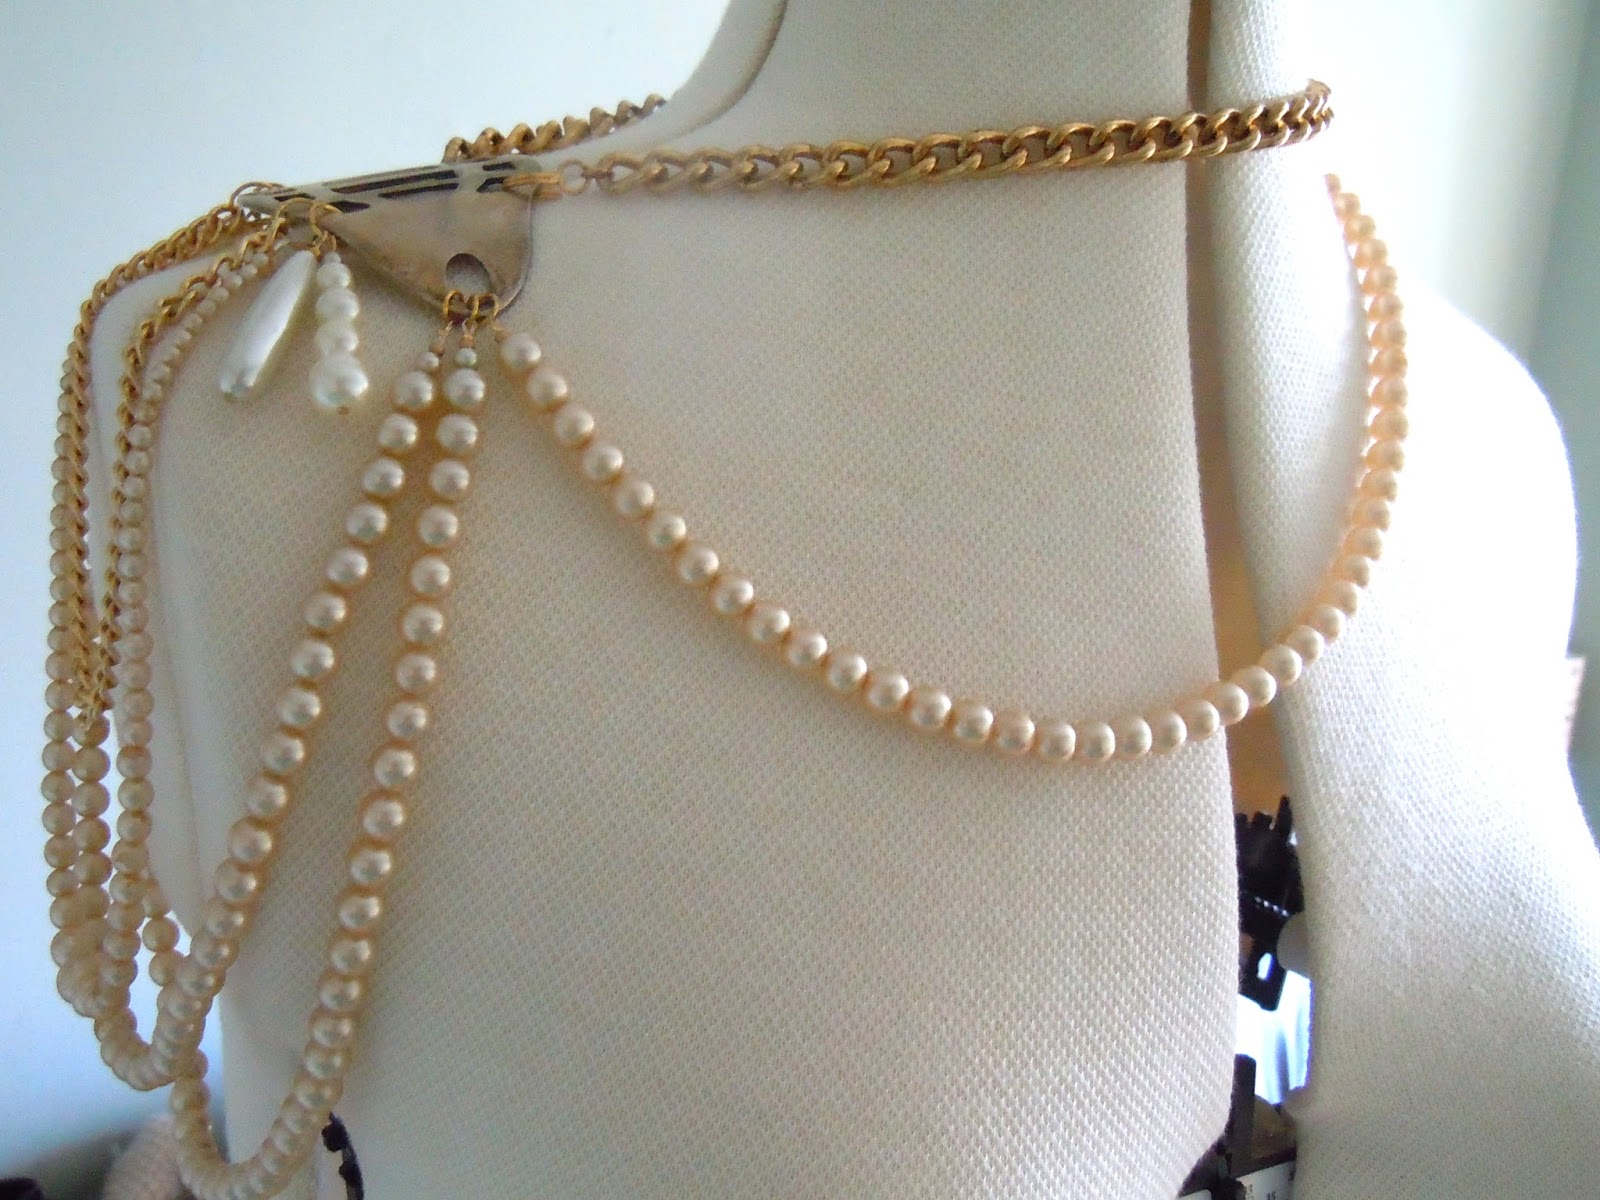
Work in progress. Lots of loose strings still, but it's starting to take shape.

Before I could fit the clasp and complete the piece, I invited C over for a fitting.  She arrived, on the bus, with her impressive dress wrapped in a double duvet cover!  I was able to adjust the length, making it slightly shorter than the original measurements, so that it would sit nicely on her collarbones.  Finally she tried on the earrings, which were simple drops made with two of the largest Aurora Borealis crystals and some remaining pearls.  Mission accomplished and big smiles all round!

Final necklace fitting, with The Dress

It was a technically challenging and emotional project to work on, but I'm enormously proud of what we created together, and both humbled and thankful for being trusting with this project.  The necklace is destined to become a future heirloom, which will be passed down through the family, adding an extra layer of history and emotional resonance to the original necklaces from which it grew. 

Knowing that my much loved friend would be wearing such a personal and completely bespoke set of jewellery at her wedding to N, made me quite emotional.  Particularly as I was unable to be there on their special day, due to prior family commitments.  At least I knew that a little bit of me was there in spirit on the day..... 

Photo reproduced with kind permission and copyright of Ollievision Photography http://www.ollievision.co.uk/  

The bride, of course, looked utterly radiant and the groom happy and handsome.  Congratulations, you truly marvellous pair!  Wishing you both many more smiles and so much joy in the years to come.

Wednesday 5 August 2015

Behind the scenes on the set of the Luna Demise mini-series

On a bitterly cold Sunday morning in March, we swung onto the driveway of a rambling red brick farmhouse in a remote Yorkshire village.

Our host David emerged from his house and waved reassuringly to us as we piled out of the car, unloading far more luggage than should surely be necessary for four actors and a jewellery designer.  As he ushered us towards the long barn, which housed his professional photography studio, the remaining cast members, make up artists and film crew started arriving.

The barn. Somewhere in rural Yorkshire. Brrrr, it's a bit parky out.

This was clearly not going to be my usual Sunday....

Back in January, my good friend Katherine told me about a mini-series which she'd written and was putting into production.  It was an ultra low-budget project, in which she plays the lead character Luna, and expected to broadcast initially as short Webisodes.  She gave me a prĂ©cis of the plot and tone of the show and asked if I would be interested in supplying her with jewellery to use in one of the episodes.  Obviously, I jumped at the chance.  Having watched the trailer and pilot and read the draft script for the episode, I set about creating some bespoke pieces.

Having spent most of last year focussing on a couple of specific collections it was really liberating to work on some completely one-off, statement pieces.  Unconstrained by considerations such as scale, practicality, or the need to produce multiples, I could dig into my box of trinkets with gusto and do some really fun recycling.  Katherine loaned me her tailor's dummy, which allowed me to pin the materials in place as I went along and experiment with more sculptural arrangements.  I created a collection of mixed media jewellery, which included recycled Victorian brass drawer handles, antique metal belt buckles and copious vintage pearls.

Vintage pearl & brass shoulder-piece, created for the Luna Demise series

A selection of my Luna Demise jewellery collection set out ready for the actors

So a couple of months later I found myself on a film set for the first time, with a case full of bespoke jewellery, and my trusty toolkit.  The two make up artists & I set ourselves up in one of the outbuildings, which had been converted into a hairdressing salon (David also happens to be a talented hairstylist and qualified Trichologist.)  The actors chose the outfits they would be wearing for the shoot and started coming in for make-up.  As I only had a rough idea of what costumes they'd be wearing I'd also brought along several one-off pieces of jewellery from my stock, just in case the new ones weren't suitable.  Luckily all the bespoke pieces I'd made could be used.  I selected pieces of jewellery to go with each outfit, then adjusted them to fit each actor's measurements before helping to put them on.  Some of the pieces of jewellery can't actually be put on without assistance.  For example the chain mail necklace which has to be tied at the back with ribbons, and the complicated earring which links by beaded chains to an ear-cuff and hairslide.

Dressing the actors in their complicated bespoke jewellery

Photos by permission of Christopher West Photography

Once dressed & made up, the actors went into the studio for their character portrait photographs and some cast & crew ensemble shots.  I was trying to play it cool but as a total film-set newbie I was completely over-excited to see my jewellery being professionally modelled & photographed.  After a brief break for lunch the filming started in earnest.  I watched the first scenes from the sidelines  before I had to make myself scarce so the whole studio space could be used.  To be frank, the studio was pretty chilly even with all the lights blazing, so I was happy to hole myself up in the cosy salon with a cuppa.  I felt sorry for the actors in their basques, fishnets and short dresses, who were wrapping up in thick coats and huddling around a fan heater between takes.

Huddling around a fan heater in the draughty studio

The day's filming ended with the gory conclusion to the episode.  I don't want to give you any plot spoilers, but the final scenes required the impressive work of the special effects make-up artist and a fair amount of fake blood.  Also some hefty chains.  Excitingly for me, the jewellery which Luna had been wearing worked its way into the plot.  I was on standby with my toolkit so I could de-construct and re-construct the piece as necessary for the final takes.  I made sure I'd collected all the blood-splattered pearls from the studio floor before I left.

You can check out the promo trailer and pilot episode of the Luna Demise mini-series on YouTube here https://www.youtube.com/user/lunademise  (I should warn you, it's not PG!)

To see the Urban Magpie jewellery showcase film produced by Zepar Films, click here.

Massive thanks to Katherine for involving me in this project and to all the cast and the crew of Zepar Films for a fascinating and brilliant day.  Also big thanks to David Charles for his hospitality & incredible portraits and Christopher West for his ace behind the scenes photography.

Can't wait to see the finished film.  Now here's those stunning photos in full.

Photo by permission of David Charles Photography

Photo by permission of David Charles Photography

Photo by permission of David Charles Photography

Photo by permission of David Charles Photography

Photo by permission of David Charles Photography

Photographs reproduced by kind permission of David Charles Photography and Christopher West Photography


Saturday 18 April 2015

Urban Magpie's recycled jewellery workshop

Until Claire from Our Handmade Collective asked me if I’d be interested in running a workshop, I’d never considered it before.  I suggested that maybe I could do an informal workshop on recycled jewellery making.

My jewellery making has always had at its heart the principle of recycling and upcycling the components of old and unloved jewellery.  I frequently use unlikely materials and found objects too.  In the past my jewellery has featured c18th clay pipes dug up on my allotment, plastic cake candle holders, rusty washers and even the blade disks from rotary mincers.


I'm often commissioned to incorporate personal heirlooms into new pieces of jewellery.  One of my favourites was to turn a friend's late mother's earring into a necklace she could treasure.  I take great satisfaction in rescuing all those odd earrings, lost beads and broken necklaces and giving them a new lease of life.


Surely other people must enjoy doing this kind of thing too.  But could I really 'teach' it?

In order to figure out how a workshop of this type would work, I decided to host an informal trial-run in my kitchen with a few friends.  We spent a very enjoyable evening of chatter, mindful activity and chilled-out creative inspiration.  It was a great way to test out the new tools I'd bought and refine the workshop format.  My friends enjoyed having the chance to get creative and try out different techniques, and everyone went home with truly personal finished pieces. 


Possibly the most ambitious project of the evening, was a ring constructed from driftwood and a scrap piece of copper co-axle wire.  


One of my friends created two cocktail rings from a pair of her late grandmother's clip-on earrings.  One to keep and one as a gift for her sister.


 Another made a stunning statement necklace from a collection of old charms and broken necklaces.

Feeling inspired?  Bookings are being taken now, for my first ever recycled jewellery making workshop on Sunday 26th April.  All you need to do is bring along your broken jewellery or vintage bits and bobs and I'll provide all the tools, findings and accessories you'll need to recycle your treasures into wonderful & wearable new jewellery.  The only limits are your imagination!

The workshop lasts 2 hours and the cost is £20 per person.  Tickets are available from Our Handmade Collective and The Bridal Emporium.  Check the FB event for more info.
https://www.facebook.com/events/359964170857962/

I'll hopefully be running another in June too.

Tuesday 17 March 2015

Brass uniform button bracelet - a very personal custom order

Early last year Lisa set me a challenge.  She had inherited a beautiful set of brass buttons from her late father, which had come from the uniform he'd worn when he was Commissionaire at Wakefield Town Hall.  The buttons feature the crest of the City of Wakefield. 


Lisa entrusted these precious family heirlooms to me and asked me to convert the buttons into a bracelet.  We discussed what style she wanted and how it might be put together.  Then I got to work.

My first challenge was finding suitable bases onto which to fix the buttons, so they would sit flat against the wrist.  As I've mentioned before, I'm not a jeweller, so making something myself was out of the question.  Eventually I managed to source some cameo mounts in approximately the correct sizes for the buttons.  Unfortunately they were totally the wrong finish; the small bases were silver and the large ones were antique bronze.  This presented me with my next challenge.


Initially I tried covering the bases with gold leaf.  The first attempt was disastrous, as I was unable to get a smooth finish.  My second attempt with the gold leaf was better but still not up to scratch.  The finish was just too rough and patchy.  Fortunately, Lisa was a very patient client.  In the end I covered the bases in Liquid Leaf and the results were stunning.

I thought it would be plain sailing from here, but this project was determined to test my skills (and patience.)  Once coated in two layers of the gold and two layers of protective sealant, I realised that the small buttons no longer fitted properly inside the small bases.  I had no choice but to drill the bases out to enlarge the bezel.


Finally it was a simple process of fixing the buttons into position and linking them together.  I finished it off with a gold-plated clasp and the bracelet had finally together.


It was an enormous privilege to work on this deeply personal project of Lisa's.  Knowing how proud her father was of his Commissionare's uniform and of Wakefield's history, I was acutely aware of how precious his buttons are to Lisa and her family.  I must again thank Lisa for her faith in me and patience with how long it took me to get this piece right.

Lisa's lovely feedback was the perfect end to my year:
"I opened my box on Christmas Eve and I was blown away. I cried. You have done the most amazing job & I cannot thank you enough (...... ) everyone loves it, thank you."

Wednesday 4 February 2015

Recycling at its most beautiful - bone china flower jewellery

Back in 2013 I found a beautiful, vintage bone china pansy brooch in a charity shop.  I recalled elegant ladies of my Grandmothers' generation wearing fabulously naturalistic and delicate floral brooches just like it when I was a child.  I knew I had to have it, but frankly I'm just not a brooch kind of girl.  I set about converting it into a ring and it proved really popular.  People started asking me if they could have one too.  A new Urban Magpie range was born.

My original pansy ring

Most of the famous pottery manufacturers in the Staffordshire area of the UK seem to have produced bone china flower jewellery from the 1930's to about the 1970's. The brooches, clip earrings & hatpins were all handmade and skilfully hand painted. 
I like to think that by up-cycling them into rings I'm celebrating this craftsmanship & giving their work a new lease of life.

Packing a punch

When I acquire the vintage flowers they've usually been languishing forgotten at the bottom of jewellery boxes and are often in a sorry state.  I clean them up & start the painstaking restoration process.  I file out any chips, sometimes having to completely re-sculpt individual leaves and petals with my trusty multitool.  Next I re-paint & varnish the damaged areas to blend them in with the original paintwork.  Finally they're fixed to silver plated adjustable ring bases.

Restoration work in progress

The flower rings proved popular, but my next concern was what to do with all the old, redundant clip-on flower earrings I kept acquiring. The blooms were too small to turn into rings, but it seemed a shame to let them go to waste. The solution was to recycle them into a collection of dainty floral hair slides. 

My popular hair slides

At the start of this year I felt ready to take the range a bit further and started incorporating the vintage flowers into simple pendants and statement necklaces.  The first pieces from the new collection have just gone on sale this week at my central Leeds stockist Our Handmade Collective and you can have a look at what's in store on my Facebook page.

One of the vintage flower necklaces
The rings are also available from my online Folksy shop.

Tuesday 3 February 2015

Postcard artwork

I have a little something un-jewellery related which I'd like to show you.
Back in November, a friend asked for contributions to a fundraising anonymous Postcard Art Fair at her school, in the style of the one at the Royal Academy in London. The majority of the 500 postcards were done by the girls at the school and some were done by the school's Art Department staff. The rest were produced by a bunch of local creative types....like me.
My contribution was this bejewelled lady in a billowing dress. It was painted in watercolour, acrylic, & silver enamel paint, against an iridescent copper background. The details were picked out with a fineliner pen.

I hope she found a nice new home.....


Sunday 25 January 2015

Why I love Woolgather art vending machines

I first found an art vending machine several months ago on a trip to The Tetley Gallery in my hometown of Leeds.  Tiny Magpie was immediately drawn to the retro-style oversized gumball machine in the foyer (ok, I was too) so we had a closer look.  Instead of sweets or rubbishy toys, the brightly coloured balls turned out to contain tiny artworks which we could buy for just a £1!  We had to give that a go.

The vending machines are provided by Woolgather, who in 2013 commissioned new works from artists across the UK to be distributed to the public via their vending machines.  The works of art had to be small enough to fit inside variously sized plastic capsules.

On a drizzly day in December, while Christmas shopping, Tiny Magpie & I stumbled upon something a bit wonderful: a Woolgather pop-up exhibition in a shop in central Leeds, full of Art Vend machines!  Examples of the diminutive artworks, which hide inside those mysterious machines, were exhibited on simple wooden tables accompanied by brief artist statements.

'Love resonates. Fortune is in your hands' by Miss Pybis

We spent some time looking at all the little artworks & talking about them, then we got the coins out.  We bought three capsules that visit, each from a different vending machine.  Two were chosen at random as Christmas gifts for my brother & his wife.  The third was for keeps.

Our capsule contained a work by Jo Marsh.  It comprised of a delicate little paper birdbox and a tiny plastic egg which opens to reveal a picture of a child saying hello.  It's utterly adorable and I have to confess I have no idea what it's about.

Our paper birdbox & egg made by Jo Marsh

I think the thing I love most about the Art Vend project is that it's accessible, cheap, whimsical and thought-provoking.  I mean, why should art have to be rarified and distant?  Why shouldn't engaging with art be fun and playful?  Some of the pieces are charming.  Some are intriguing.  Some are surreal.  Some are downright weird.  The thrill, of course, is in not knowing what you'll find when you pop open your capsule.  However, encountering one of the machines always makes me giggle excitedly and my inner child shrieks "Can I have one? Can I? Can I? Can I?"

If you find one of these machines I urge you to give it a try.

You can find out more about Woolgather's Art Vend project here: http://woolgatherart.com/about/
You can join the Woolgather website by using #woolgatherart through twitter or instagram with your pictures of the artwork you discover inside.